This article details the process of creating an event management platform, Event-Ally, from the ground up. It covers the purpose of the platform, the technologies used, setting up the development environment, designing the user interface, integrating Appwrite for backend services, building event management features, and deploying the platform. It also provides potential future improvements and encourages users to explore and contribute to the project

Introduction
I have been an active member of the student community here in India. I have been participating in and volunteering in various events across different cities, I was also fortunate enough to be invited as a speaker in a few of the events 😉. I noticed that most event organizers use Google Forms to take event registrations and social media to announce their events.
Now once they get all the registrations they need to extract responses into an Excel file and then manually send the invitation to every attendee. If any organizer takes one step forward he/she has to develop his/her event website which is again time-consuming.
Through Event-Ally (inspired by Eventually 😁) I decided to help out both the organizers and the attendees to have a seamless and hassle-free experience of organizing and attending events.
In this article, I will guide you on how I build the core features of my app, some difficulties I faced how I solved them, and how you can contribute to building this platform.
A brief overview of Event-Ally
Currently Event-Ally has these features which can be used out of the box
Authenticating the user
Creating an event
Viewing all events
Viewing events created by you
Viewing event details
Registering for an event
Displaying the list of registered users
Sending them acceptance or rejection mail through a dashboard
I plan to add a QR-based check-in feature soon in the app and markdown support for entering details about the event.
Technologies used: Next.js and Appwrite
Talking about the tech stack, technologies, and programming language I have primarily used Next.js for the frontend part and Appwrite to handle all my backend-related functionalities. A brief breakdown below 👇
Next.js (Next.js is just awesome with its new routing system and performance :) )
Typescript
Tailwind CSS (Time is money)
Appwrite (Developer experience and open source)
SendGrid (Sending emails)
Vercel (Deploying and hosting)
GitHub (Version control)
A lot of npm packages
Setting up the development environment
Now let's just quickly set up our development environment. We don't need a lot of setups so will have a quick walkthrough
Installing Node.js and npm
If you have not already installed Node.js on your machine quickly do it by visiting the Node.js website and selecting the latest stable version.
Once you download the .exe file open it and follow the on-screen instructions and you are good to go. This also installs npm onto your machine.

We will be using npm as a package manager but you can also go forward with yarn.
Setting up and creating the Next.js project
To set up Next.js you just need to run this command in your terminal.
npx create-next-app@latest
Now you need to enter details about your project, just choose the following configurations so we are on the same page
√ What is your project named? ... event-ally
√ Would you like to use TypeScript with this project? ... No / Yes (Yes)
√ Would you like to use ESLint with this project? ... No / Yes (Yes)
√ Would you like to use Tailwind CSS with this project? ... No / Yes (Yes)
√ Would you like to use `src/` directory with this project? ... No / Yes (No)
√ Use App Router (recommended)? ... No / Yes (Yes)
√ Would you like to customize the default import alias? ... No / Yes (No)
Creating a new Next.js app in C:\Users\ranja\Desktop\event-ally.
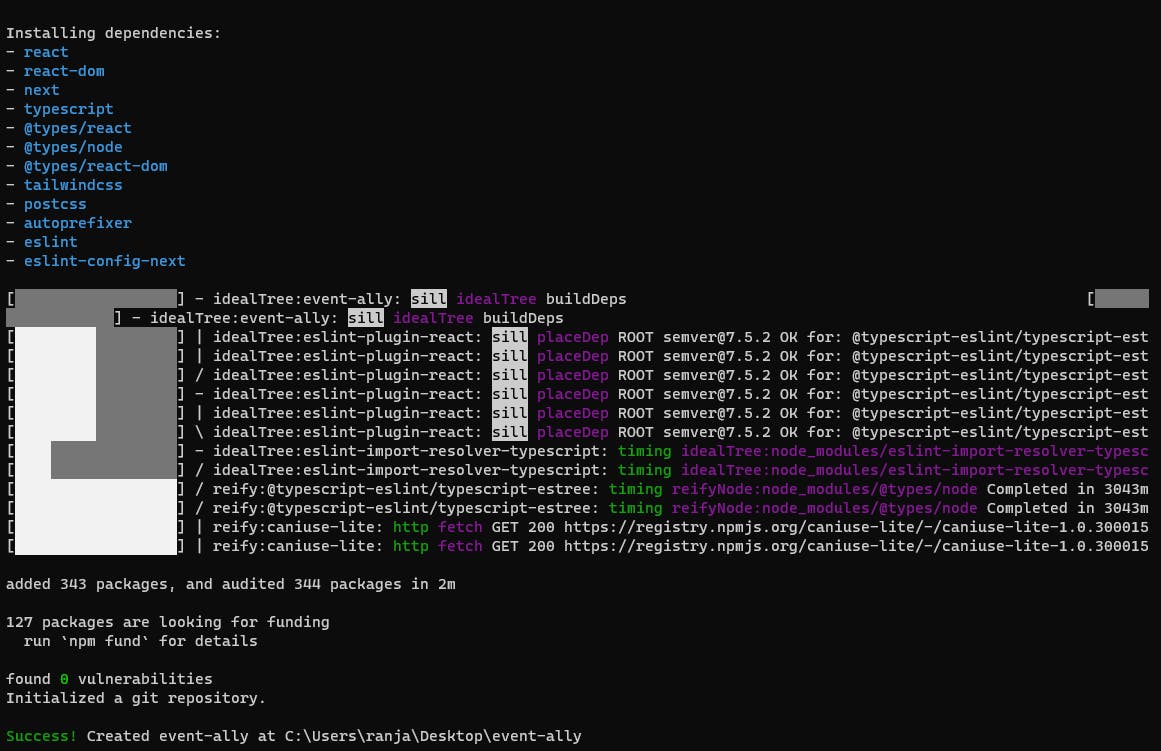
Once you hit enter you would see all the dependencies getting installed and the project getting configured. You can proceed once you see the success message.

Setting up Appwrite
Since Appwrite now has a cloud-hosted version at https://cloud.appwrite.io, we don't need to go through all the docker setup 😌. So we will see how can we add our web application platform to Appwrite, set up OAuth providers, and create all the required databases and storage buckets.
Head over to Appwrite Cloud
Click on the Create Project button and enter our project name.

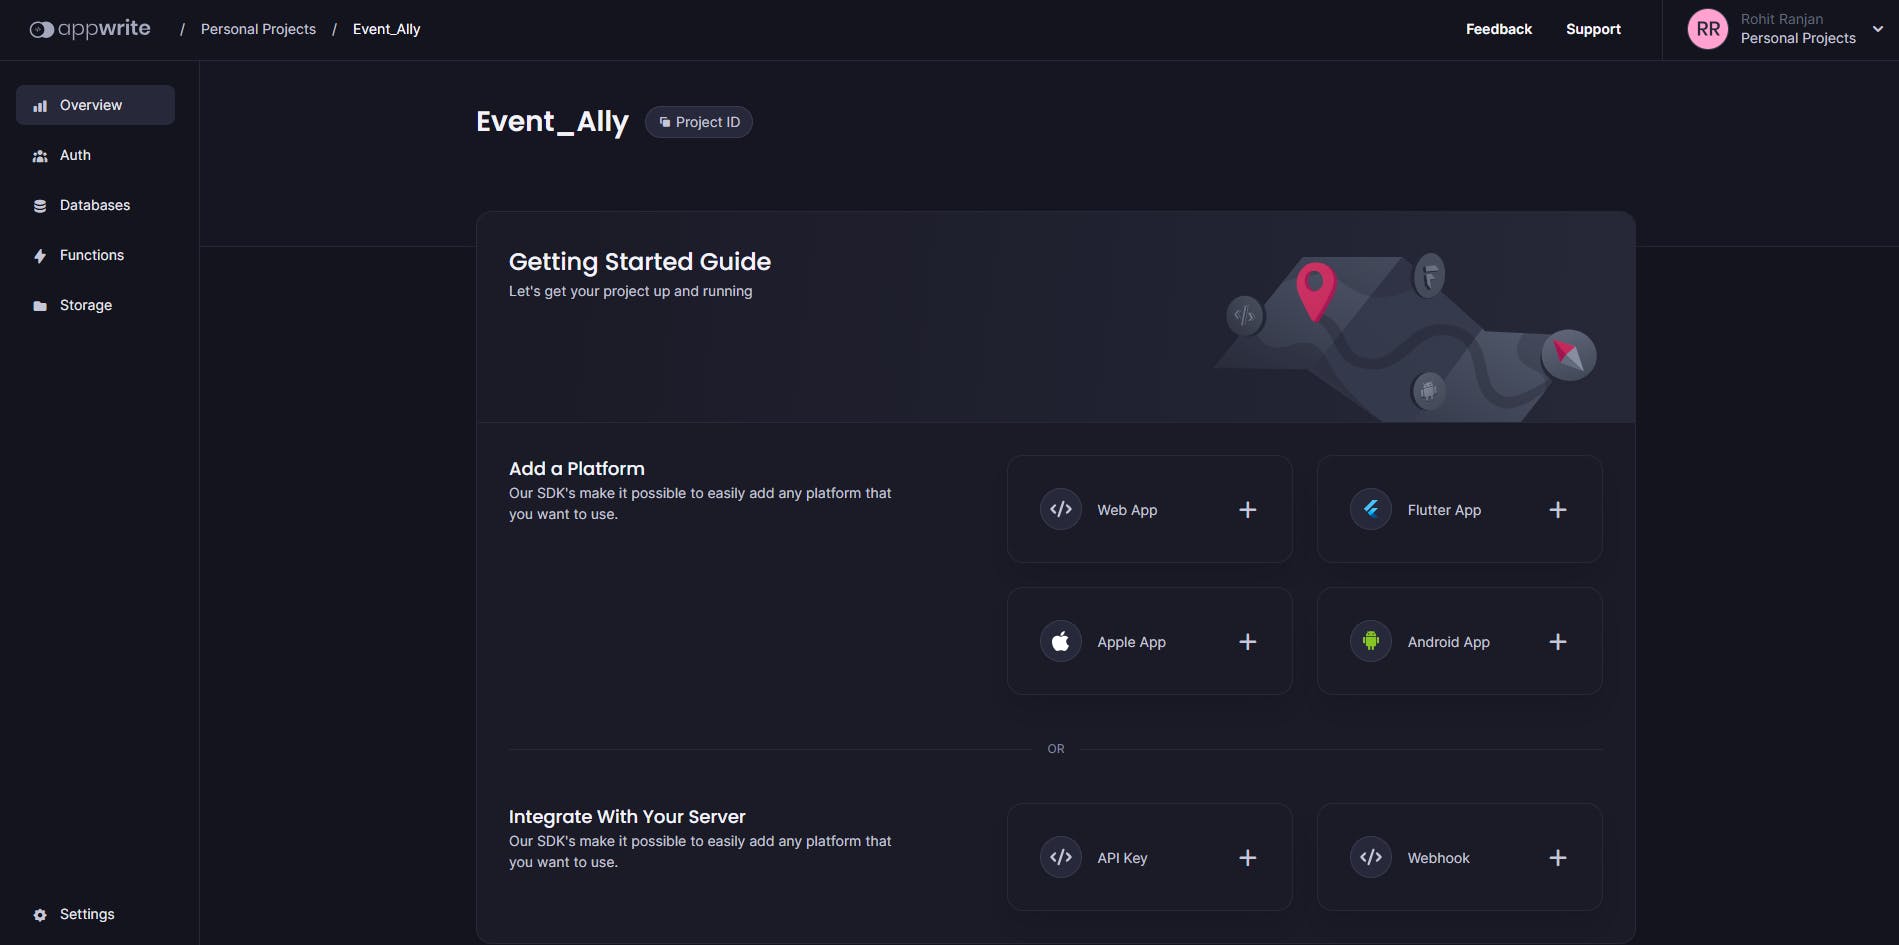
Once your project has been created you will see your dashboard where you can add a platform to get started.

Click on Web App. Enter your application name and Hostname (localhost for our development, we will change it once we deploy our application)

The next steps are optional just glance through them and click next and at last Take me to my Dashboard

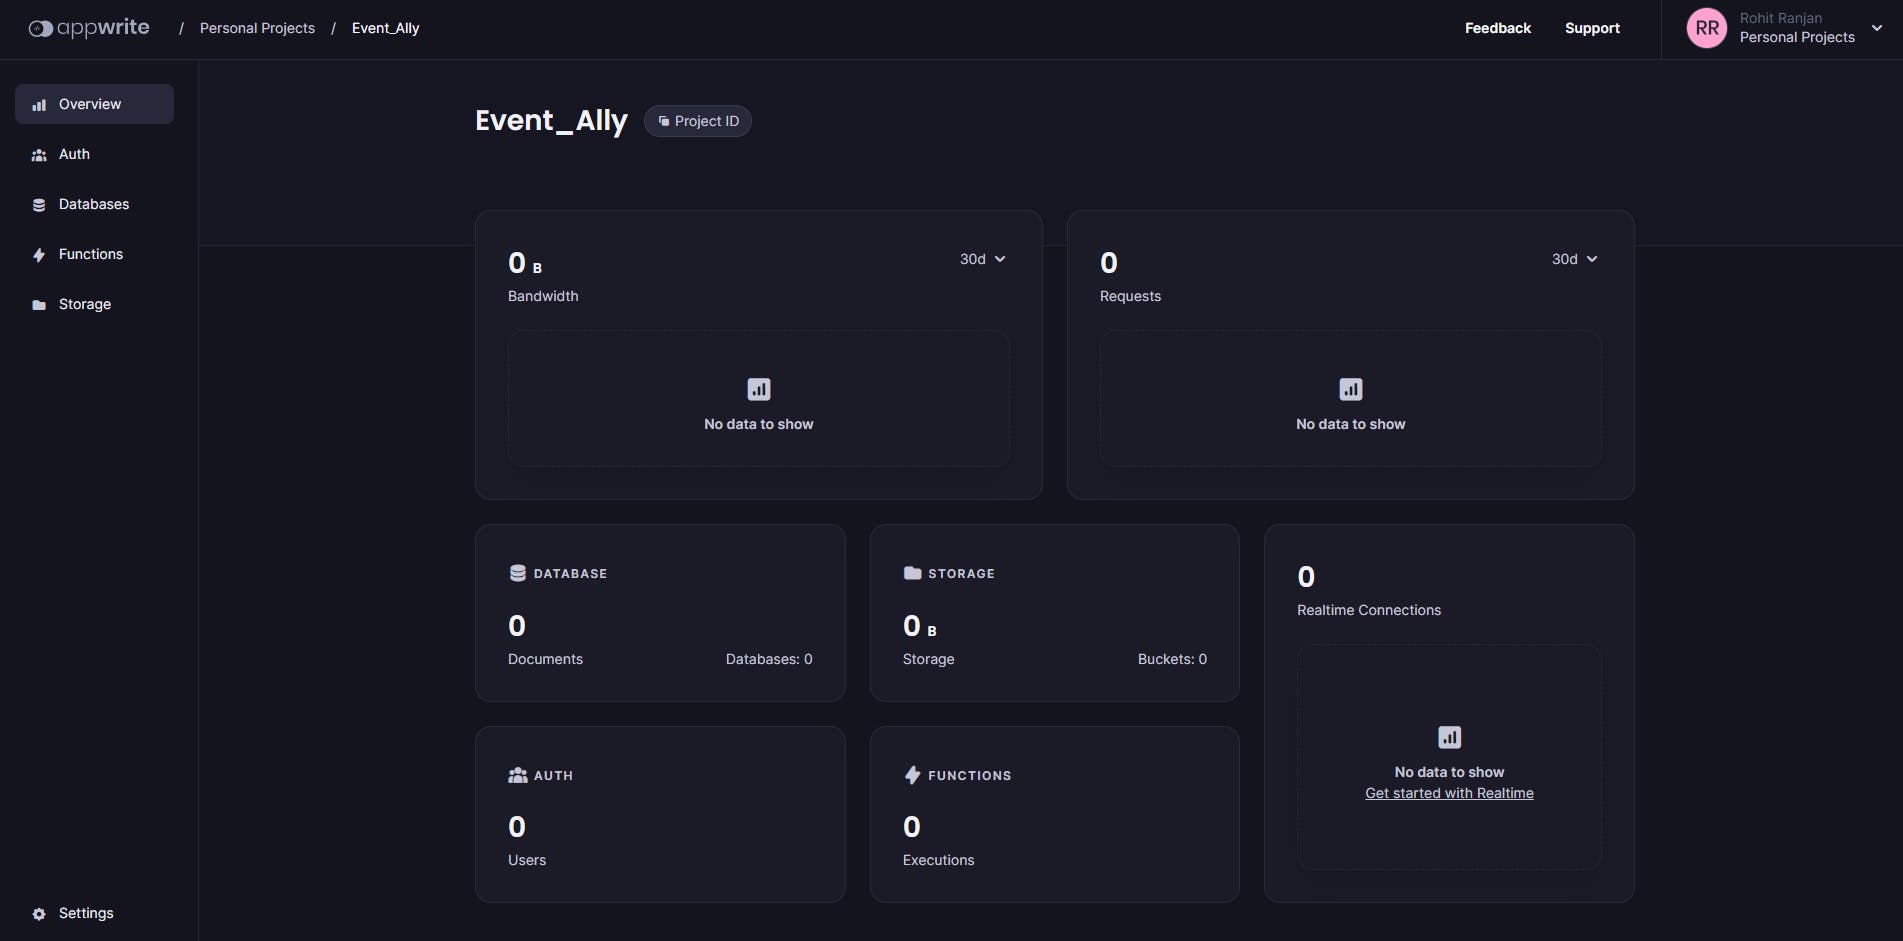
Woah, you have successfully added your web application to the Appwrite console. once you do that you will see a new dashboard that has different key metrics and statistical data about your application (we're going to discuss that 😉)

The last step is to add Appwrite's npm package to your project just run the following command and we are all set to start building our application 💪
npm i appwrite
Next.js Routing System
Next.js uses Page based routing system so all the folders you create inside the /app directory act as a route and you need to add a page.tsx which would only be rendered on the user's screen

Learn more about Next.js routing in the official docs. Nextjs Routing
Building our project
Now all the setup part is done let's start building out our project.
Creating some databases
Before we proceed I would suggest creating some database in your Appwrite console so that it would be easier to go forward in this article.
Create the following Database with these names. Just click on Create Database and enter the name.

Inside the Events Database create a collection with the name Active Events.

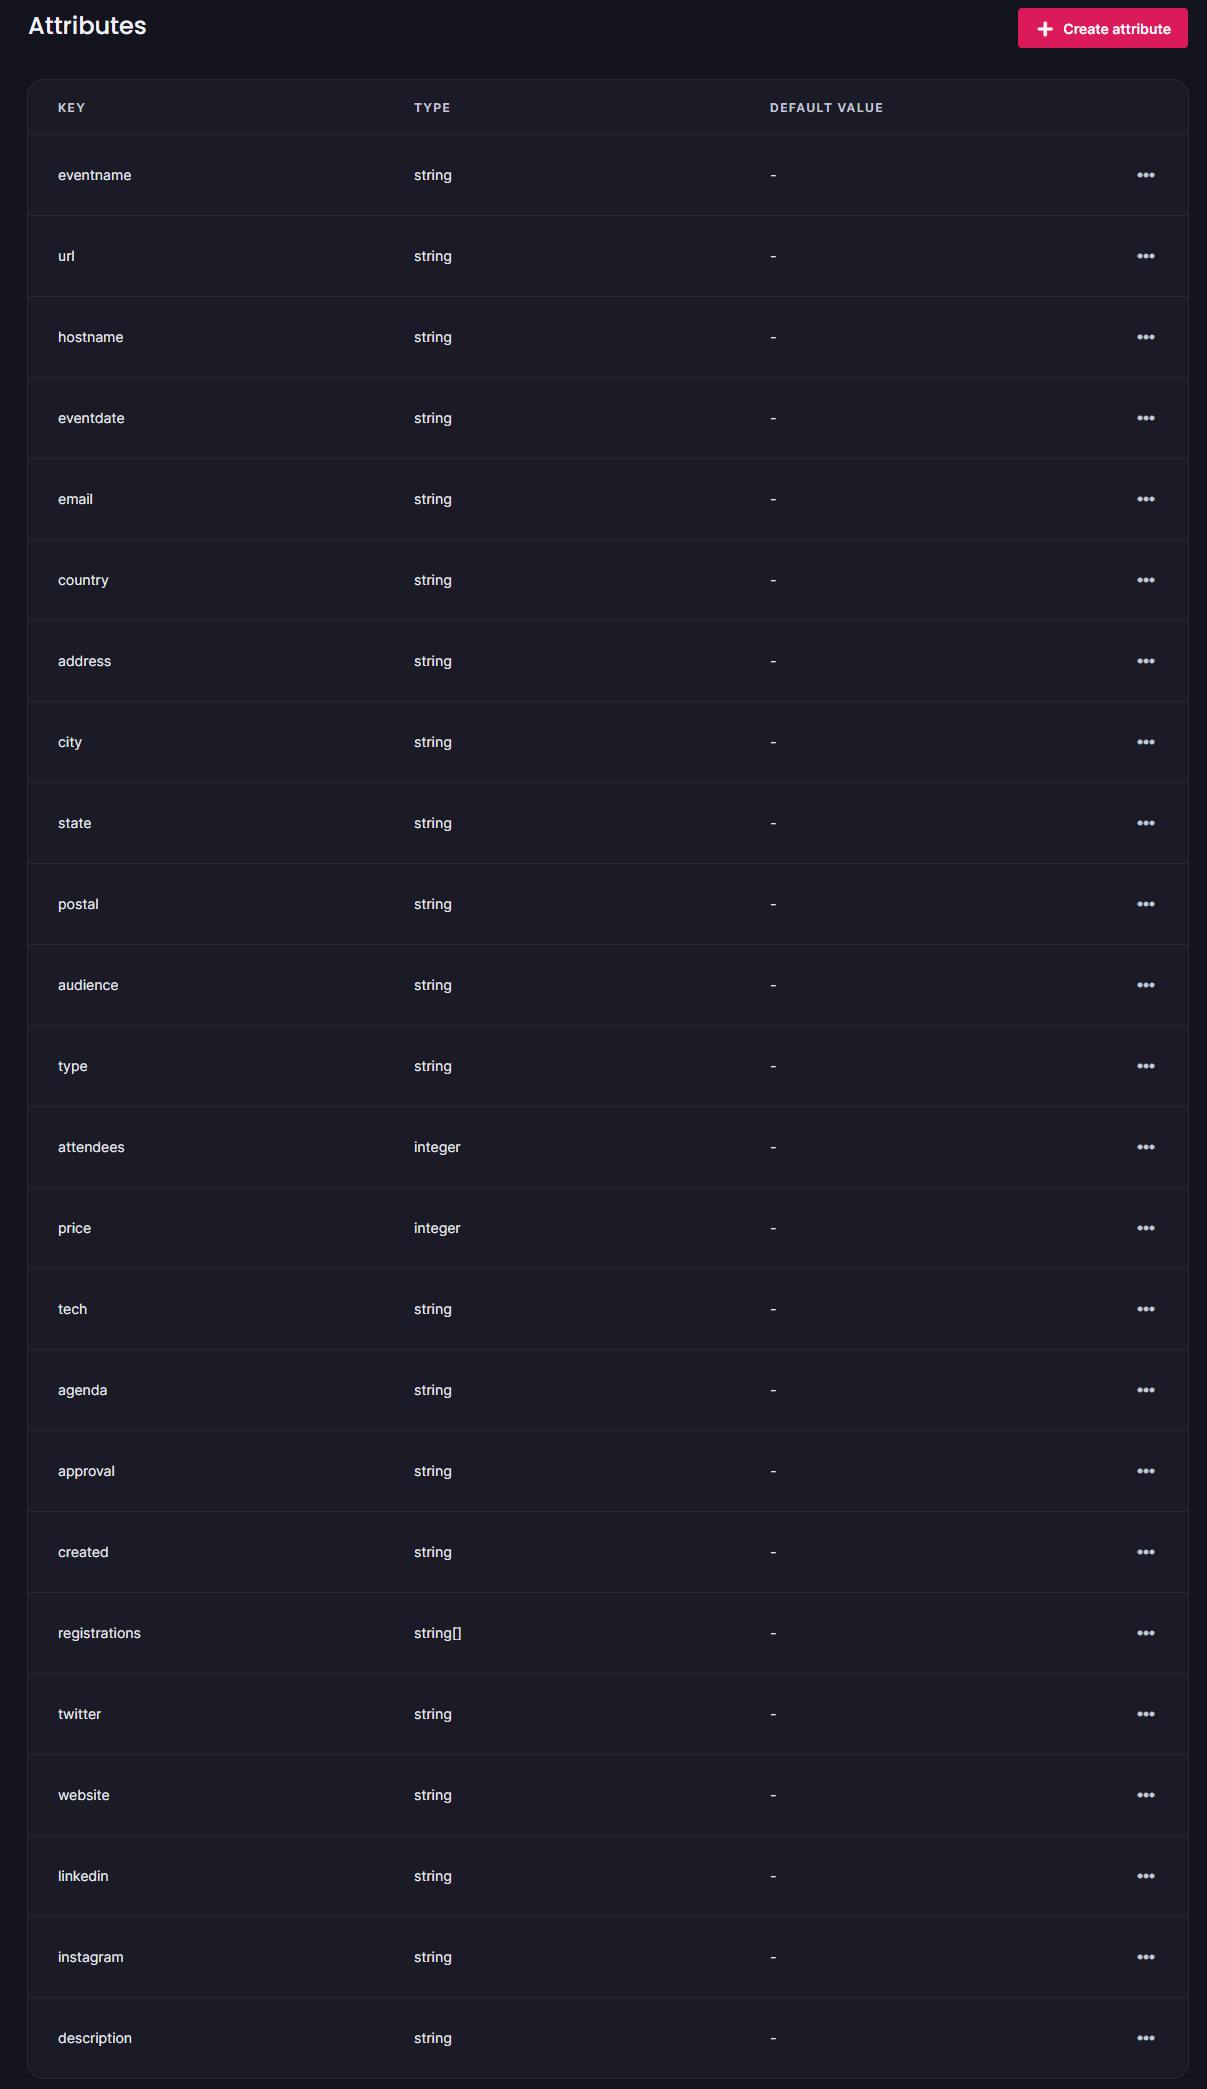
Inside the Active Events Collection add the following attributes by clicking on the Create attribute button


Also, create an API key from the console page at the bottom-most part and give it the database scope

The last step is to add all the IDs and API keys in our env.local file
NEXT_PUBLIC_DBKEY =
NEXT_PUBLIC_REGDB =
NEXT_PUBLIC_EVENTBUCKET =
NEXT_PUBLIC_APPURL =
NEXT_PUBLIC_PROJECTID =
NEXT_PUBLIC_DATABASEID =
NEXT_PUBLIC_EVENT_COLLID =
NEXT_PUBLIC_SPODB =
Authenticating users
I will be using Google, GitHub, and Magic URL login to authenticate users in my application. First, let's set up an Appwrite services class to ease down our process of calling authentication functions.
Create a file inside your /app directory as constants/appwrite_config.tsx and create a class AppwriteConfig
class AppwriteConfig {
  databaseId: string = `${process.env.NEXT_PUBLIC_DATABASEID}`;
  activeCollId: string = `${process.env.NEXT_PUBLIC_EVENT_COLLID}`;
  bannerBucketId: string = `${process.env.NEXT_PUBLIC_EVENTBUCKET}`;
  regDbId: string = `${process.env.NEXT_PUBLIC_REGDB}`;

  client: Client = new Client();
  account: Account = new Account(this.client);
  databases: Databases = new Databases(this.client);
  regDb: Databases = new Databases(this.client);
  storage: Storage = new Storage(this.client);
  user: User = {} as User;

  constructor() {
    this.client
      .setEndpoint("https://cloud.appwrite.io/v1")
      .setProject("647449f26e9ca9aadf03");
  }
}
Now just create your Social login methods that will be called once you click the button
googlelog(): void {
    try {
      const promise = this.account.createOAuth2Session(
        "google", // OAuth Provider Name
        `${process.env.NEXT_PUBLIC_APPURL}/login/sucess`, //success URI
        `${process.env.NEXT_PUBLIC_APPURL}/login/failure`, // Failure URI
        []
      );
      this.getCurUser();
    } catch (error) {
      console.log(error);
    }
  }

  githublog(): void {
    try {
      this.account.createOAuth2Session(
        "github",
        `${process.env.NEXT_PUBLIC_APPURL}/login/sucess`,
        `${process.env.NEXT_PUBLIC_APPURL}/login/failure`,
        []
      );
      this.getCurUser();
    } catch (error) {
      console.log(error);
    }
  }
magicUrlLogin(email: string): void {
    this.account.createMagicURLSession(
      ID.unique(),
      email,
      `${process.env.NEXT_PUBLIC_APPURL}/login/sucess`
    );
    this.getCurUser();
  }
Creating Events
As we have created our events database schema in our active events collection, let's see how we can create an event in our database
Create your file app/create/create.tsx and create a form to take input for all the required fields. I will show you an example of one such field and you can create such fields for every attribute.
const CreateEventPage = () => {
....................
....................
const [eventname, setEventName] = useState(" ");

return (
<div className="sm:col-span-4 ">
     <label
                  htmlFor="eventname"
                  className="block text-sm font-medium leading-6 text-gray-900"
                >
                  Event Name
                </label>
                <div className="mt-2">
                  <input
                    type="text"
                    name="eventname"
                    id="eventname"
                    value={eventname}
                    onChange={(e) => setEventName(e.target.value)}
                    autoComplete="given-name"
                    className="block w-full rounded-md border-0 py-1.5 text-gray-900 shadow-sm ring-1 ring-inset ring-gray-300 placeholder:text-gray-400 focus:ring-2 focus:ring-inset focus:ring-indigo-600 sm:text-sm sm:leading-6"
                  />
                </div>
              </div>)
}
To give an option to add multiple sponsors in the form try storing the list of sponsors in an array. Below is one of the approaches for the same
interface Sponsors {
  id: number;
  name: string;
  url: string;
}

const CreateEventPage = () => {
 const [sponsors, setSponsors] = useState<Sponsors[]>([
    { id: 1, name: "", url: "" },
  ]);

  const handleSponsorChange = ( // Updating sponsors field
    id: number,
    fieldName: string,
    value: string
  ) => {
    const updatedFields = sponsors.map((field) =>
      field.id === id ? { ...field, [fieldName]: value } : field
    );
    setSponsors(updatedFields);
  };

  const handleAddSponsor = () => {  // Adding sponsors
    const newField: Sponsors = {
      id: sponsors.length + 1,
      name: "",
      url: "",
    };
    setSponsors([...sponsors, newField]);
  };

  const handleRemoveSponsor = (id: number) => { // removing a sponsor field
    const updatedFields = sponsors.filter((field) => field.id !== id);
    setSponsors(updatedFields);
  };
}
Once you are done with adding every field just create an object for the AppwriteConfig class and call the createEvent Method.
First, let's create our createEvent Method inside the AppwriteConfig Class. (Note carefully how we are constructing the bucket URL for the logo uploaded in our bucket)
createEvent(
    eventname: string,
    description: string,
    banner: File,
    hostname: string,
    eventdate: string,
    email: string,
    country: string,
    address: string,
    city: string,
    state: string,
    postal: string,
    audience: string,
    type: string,
    attendees: number,
    price: number,
    tech: string,
    agenda: string,
    sponsor: Sponsors[],
    approval: string,
    twitter: string,
    website: string,
    linkedin: string,
    instagram: string
  ): Promise<String> {
    try {
      this.storage
        .createFile(this.bannerBucketId, ID.unique(), banner)
        .then((res) => {
          this.databases
            .createDocument(this.databaseId, this.activeCollId, ID.unique(), {
              eventname: eventname,
              description: description,
              url: `https://cloud.appwrite.io/v1/storage/buckets/${this.bannerBucketId}/files/${res.$id}/view?project=${process.env.NEXT_PUBLIC_PROJECTID}&mode=admin`,
              hostname: hostname,
              eventdate: eventdate,
              email: email,
              country: country,
              address: address,
              city: city,
              state: state,
              postal: postal,
              audience: audience,
              type: type,
              attendees: attendees,
              price: price,
              tech: tech,
              agenda: agenda,
              approval: approval,
              created: JSON.parse(localStorage.getItem("userInfo") || "{}").$id,
              twitter: twitter,
              website: website,
              linkedin: linkedin,
              instagram: instagram,
              registrations: [],
            })
            .then((res) => {
              const serverConfig = new ServerConfig();
              serverConfig.createRegColl(res.$id, eventname);
              serverConfig.createSponColl(res.$id, eventname, sponsor, JSON.parse(localStorage.getItem("userInfo") || "{}").$id);
              return Promise.resolve("sucess");
            });
        });
    } catch (error) {
      console.log("error block 1");
      throw error;
    }
    return Promise.resolve("sucess");
  }
Now just simply call the createEvent method and on success navigate to the events listing page
const router = useRouter();
const appwriteConfig = new AppwriteConfig();

const handleSubmit = (e: FormEvent) => {
    e.preventDefault();

    appwriteConfig
      .createEvent(
        eventname,
        description,
        banner || new File([], ""),
        hostname,
        eventdate,
        email,
        country,
        address,
        city,
        state,
        postal,
        audience,
        type,
        attendees,
        price,
        tech,
        agenda,
        sponsors,
        approval,
        twitter,
        website,
        linkedin,
        instagram
      )
      .then((res) => {
        if (res == "sucess") {
          router.push("/events");
        } else {
        }
      });
  };
Listing all the events
Now once I have created my event, I would like to list it on a page so that other people can see and register for it. What I would also like is that the listing page is Realtime i.e. as soon as an event is created or deleted it is updated on the listing page without the need to reload the page. We will achieve this using Appwrite's real-time API.
Create an app/events/event.tsx file in your project directory.
Create a variable to store all the events from the database
const [events, setEvents] = useState<Models.Document[]>();Use the appwriteConfig object to list all the documents present in a collection (Because we are storing each event as a document in our Active Events collection)
 appwriteConfig.databases
       .listDocuments(
         `${process.env.NEXT_PUBLIC_DATABASEID}`,
         `${process.env.NEXT_PUBLIC_EVENT_COLLID}`
       )
       .then(
         function (response) {
           setEvents(response.documents);
         },
         function (error) {
           console.log(error);
         }
       );
To add Realtime support we will subscribe to the documents change channel and wrap all of our code inside our useEffect. Below is the complete code for my event listing page
 "use client";

 import { useEffect, useState } from "react";
 import { AppwriteConfig, ServerConfig } from "../constants/appwrite_config";
 import Header from "../components/header";
 import { Models, Client } from "appwrite";
 import { MdOutlinePlace } from "react-icons/md";
 import { IoIosPeople } from "react-icons/io";
 import { useRouter } from "next/navigation";

 const client = new Client()
   .setEndpoint("https://cloud.appwrite.io/v1")
   .setProject("YOUR_PROJECT_ID");

 export default function EventListing() {
   const appwriteConfig = new AppwriteConfig();
   const server = new ServerConfig();

   const [events, setEvents] = useState<Models.Document[]>();
   const [loader, setLoader] = useState(false);

   const router = useRouter();

   useEffect(() => {
     setLoader(true);
     appwriteConfig.databases
       .listDocuments(
         `${process.env.NEXT_PUBLIC_DATABASEID}`,
         `${process.env.NEXT_PUBLIC_EVENT_COLLID}`
       )
       .then(
         function (response) {
           setEvents(response.documents);
         },
         function (error) {
           console.log(error);
         }
       );

     const unsubscribe = client.subscribe(
       `databases.${process.env.NEXT_PUBLIC_DATABASEID}.collections.${process.env.NEXT_PUBLIC_EVENT_COLLID}.documents`,
       (response) => {
         appwriteConfig.databases
           .listDocuments(
             `${process.env.NEXT_PUBLIC_DATABASEID}`,
             `${process.env.NEXT_PUBLIC_EVENT_COLLID}`
           )
           .then(
             function (response) {
               setEvents(response.documents);
             },
             function (error) {
               console.log(error);
             }
           );
       }
     );

     setLoader(false);
   }, []);
Registering for an event
Once you created an event and listed it on the event listing page, you want users to register for it on the event details page.
To create an event details page we will be using dynamic routes and navigate to /events/[document_id] (Remember, each event is stored as a document) and then extract all the details using the document_id for that event.
Create a dynamic route file as app/events/[event]/page.tsx. Read more about dynamic routes here.
Create a variable to store the document details
const [docs, setDocs] = useState<Models.Document>();User
parmas[event]to access the dynamic route ID.Here you are first getting the particular document for the specific event. Then you get all the registrations for that event from our Registrations Database (for checking if the current user has already registered for the event or not), lastly getting the list of all the sponsors from our Sponsor Database for that particular event (Collection)
 export default function Event({ params }: { params: { event: string } }) {
     useEffect(() => {
     setLoader(true);
     const getDocs = appwriteConfig.databases
       .getDocument(
         `${process.env.NEXT_PUBLIC_DATABASEID}`,
         `${process.env.NEXT_PUBLIC_EVENT_COLLID}`,
         params["event"]
       )
       .then(
         function (response) {
           setDocs(response);
           setReg(response["registrations"]);

           if (
             response["registrations"].includes(
               JSON.parse(localStorage.getItem("userInfo") || "{}").$id
             )
           ) {
             setIsReg(true);
           }
         },
         function (error) {
           console.log(error);
         }
       );
     appwriteConfig.databases
       .listDocuments(`${process.env.NEXT_PUBLIC_SPODB}`, params["event"])
       .then(
         function (response) {
           setSponsors(response.documents);
         },
         function (error) {
           console.log(error);
         }
       );
 }
Now once I click the register button I want to make a couple of changes in my database. Let's see them one by one.
The first, step is to add (update) the userId of the user in the event's document inside the Active Event collection, then create a document of the user with details like name and email and also assign the document id the same as that of the userId (We will use it to view All registrations for an event).
 // all this code inside OnClick of Reg button
 appwriteConfig.databases
   .updateDocument(
     `${process.env.NEXT_PUBLIC_DATABASEID}`,
     `${process.env.NEXT_PUBLIC_EVENT_COLLID}`,
     params["event"],
     {
       registrations: reg,
     }
   )
   .then(() => {
     appwriteConfig.regDb
       .createDocument(
         `${process.env.NEXT_PUBLIC_REGDB}`,
         params["event"],
         JSON.parse(localStorage.getItem("userInfo") || "{}").$id,
         {
           name: JSON.parse(localStorage.getItem("userInfo") || "").name,
           email: JSON.parse(localStorage.getItem("userInfo") || "").email,
           confirm: "",
         }
       )
       .then((res) => {
         router.push("/events/sucessreg");
       });
   });
Viewing all the registrations for an event and sending acceptance/rejection emails
As an organizer, you would like to view all the registrations for your event and also send them acceptance or rejection mail for their event. Let's see how can we add this.
Now as you know, as soon as an event document is created a corresponding collection is created in the Registrations database, and once a user registers for an event a, document is created with user details in the event's collection. So we just need to list all the documents in the collection for that particular event from the Registrations database, Simple :)
Create an app/stats/[event]/page.tsx file
As we have done before, inside useEffect we will call the listDocuments method and also subscribe to the documents channel to update the list as soon as someone registers.
useEffect(() => {
    appwriteConfig.databases
      .listDocuments(`${process.env.NEXT_PUBLIC_REGDB}`, params["event"])
      .then(
        function (response) {
          setDocs(response.documents);
        },
        function (error) {
          setDocs([]);
          console.log(error);
        }
      );
    appwriteConfig.databases.getDocument(
      `${process.env.NEXT_PUBLIC_DATABASEID}`,
      `${process.env.NEXT_PUBLIC_EVENT_COLLID}`,
      params["event"]
    ).then(
      function (response) {
        setEvent(response);
      }
    );
    const unsubscribe = client.subscribe(
      `databases.${process.env.NEXT_PUBLIC_REGDB}.collections.${params["event"]}.documents`,
      (response) => {
        appwriteConfig.databases
          .listDocuments(`${process.env.NEXT_PUBLIC_REGDB}`, params["event"])
          .then(
            function (response) {
              setDocs(response.documents);
            },
            function (error) {
              setDocs([]);
              console.log(error);
            }
          );
      }
    );
  }, []);
Now to send acceptance and rejection mail let's create two separate handlers.
const handleAcceptanceEmail = (id: string, name: string, email: string) => {
    appwriteConfig.databases
      .updateDocument(`${process.env.NEXT_PUBLIC_REGDB}`, params["event"], id, {
        confirm: "accept",
      })
      .then(() => {
        callAPI(
          email,
          `Knock Knock, Seems like your lucky day`,
          `Hey ${name}, You have been aceepted to attend the ${event && event.eventname}. We hope you have a great time. Contact the host at ${
            JSON.parse(localStorage.getItem("userInfo") || "{}").email
          } for any further queries`
        );
      });
  };

  const handleRejectionEmail = (id: string, name: string, email: string) => {
    appwriteConfig.databases.updateDocument(
      `${process.env.NEXT_PUBLIC_REGDB}`,
      params["event"],
      id,
      {
        confirm: "reject",
      }
    ).then(() => {
      callAPI(
        email,
        `We appreciate your interest in the event.`,
        `Hey ${name}, we regret to inform you that your invitation has been cancelled to attend ${event && event.eventname}. We hope you look for other events in future. Contact the host at ${
          JSON.parse(localStorage.getItem("userInfo") || "{}").email
        } for any further queries`
      );
    });
  };
You might notice a few things this is a basic template that sends an email to the user's email as soon you click on the accept and reject buttons respectively. Also, It's calling the call API function, let's see its implementation.
const callAPI = async (email: string, subject: string,  message: string) => {
    try {
      fetch("https://myownapi/sendemail", {
        method: "POST",
        body: JSON.stringify({
          email: email,
          subject: subject,
          message: message,
        }),
        headers: {
          "content-type": "application/json",
        },
      });
      console.log(data);
    } catch (err) {
      console.log(err);
    }
  };
This callAPI method simply hits the POST request at /sendemail endpoint with all the required contents in the body at my custom-made API which further calls the SendGrid API to send email to the respective user. Although this can be down directly into Next.js API, just to make my email service more abstract and reusable I decided to create a separate Nodejs API. You can view it here and how it's implemented.
Conclusion
That's it. I guess I have discussed all the core functionalities of the application and how to implement them. If you think there is any feature that I can explain more in-depth let me know.
As a future improvement, I'm working on adding a QR-based check-in feature and also adding support for markdown in the event description field.

If you wish to see the whole code along with all the tailwind CSS parts, head over to the GitHub Repo below
https://github.com/Rohit-RA-2020/Task-Management
If you wish to contribute to the project or request any feature just go ahead and add a PR.
Lastly, you can try out the project live at https://eventally.vercel.app/ without running locally on your machine 😉.
If you are someone who prefers a video tutorial instead of a written blog, follow this YouTube video.